The Making of UPYRI – JS13k 2023 Post Mortem
After Last Years Competition
At the end of last year’s competition, I knew there were a handful of things I wanted to do to prepare for the following year.
Toolset
While I had already come up with a pretty good build process before last years competition, there were a few annoying things about it.
- The shader minifier I had chosen had to be run manually. Any time you tweak shader code, go run the minifier, over and over. It also output super old school non module js code, which then I had to convert to modules.
- My minified js code still had some words not minified. I thought Closure was smart enough to know what to minify vs not, but it turns out no minifiers are. This isn’t too surprising in hindsight given the extremely…flexible… nature of javascript, but I wanted to solve it.
- While I was using RoadRoller, I was limited by the JS version, since it was part of my build process. I wanted to make use of it’s infinite run feature, but that only worked from the command line, and only ouptut settings that worked with the command line.
I solved all of these problems, and all of this went in to my starter kit, which is available on github: https://github.com/roblouie/js13k-typescript-starter-webgl. This made my life much easier this year, and hopefully helped some others as well.
Textures
Last year I generated noise to create textures, all in JavaScript. This is slow. Slow enough that you can’t generate high res textures. At the end of last years comp, I learned that SVGs can generate noise. Throughout the last year, I also learned they can do diffuse lighting, displacement mapping, blurring, and lots of other cool things. Their noise generation is also much faster than JavaScript. I wrote a small SVG generation library, and changed my code over to using SVGs.
Making UPYRI
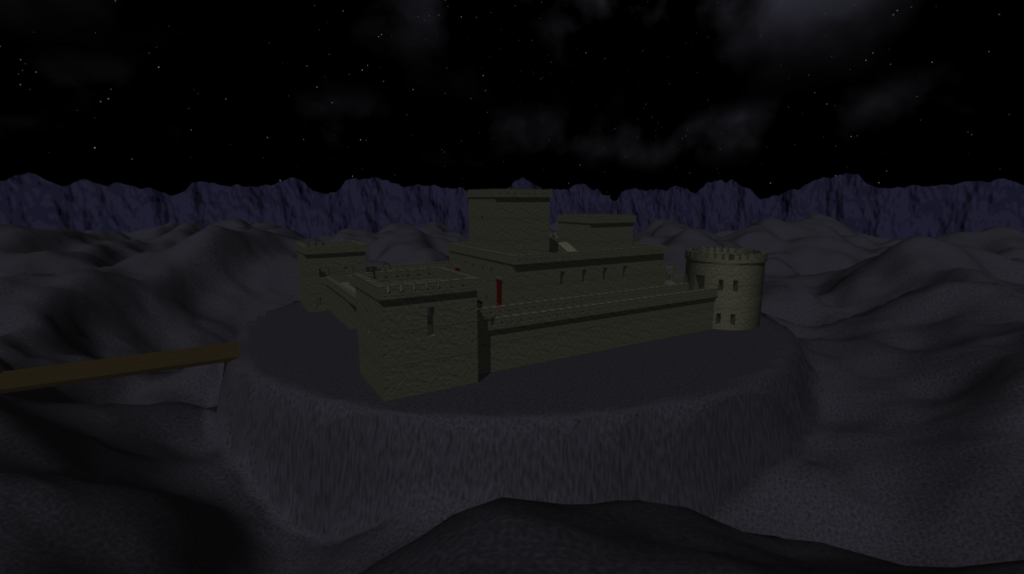
While the theme was initially quite difficult to find ideas for, I started searching what mythical creatures were introduced in the 13th century. Vampire happened to be one I searched, and when I found the information about Upyri, I knew I had my concept. Armed with this idea and my new SVG knowledge, I made a title screen on day one, which largely stayed the same in the final game (just now it has a 3d scene behind it).
Moldable Cube Returns, Now with Better Texturing
My game engine is largely the same as last year, which you can read about here. The modeling is based on the idea of reforming cubes made of many triangles. This worked, but each side of the cube fully contained the texture applied to it. You could adjust the repeat of the texture at a per-texture level, but all geometry that used that texture got the same scaling. This was fine last year, it makes textures repeat across a single plane just fine. But when you try to build a large structure from multiple cubes of different sizes, you have problems.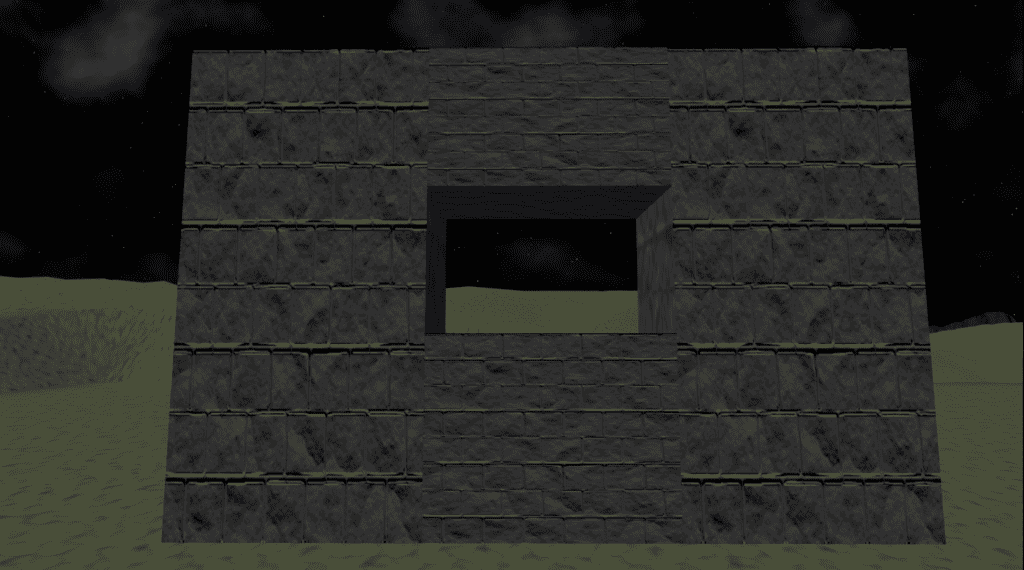
You can see that the texturing is all messed up. The outer walls are tall and thin, so the texture is stretched vertically. The inner walls above and below the window are short and wide, so the texture is stretched horizontally. While I can fix the texture distortion for one of these using the x and y repeats, I can’t make them blend seamlessly. At least, not without a code change.
I ended up creating a spreadTextureCoords method on my moldable cube, that adjusted the texture coords on each side of the cube based on that coordinate’s matching vertex position, with an adjuster and shifter so I could adjust scaling, and fine tune alignment in certain places.
spreadTextureCoords(scaleX = 12, scaleY = 12, shiftX = 0, shiftY = 0) {
    const texCoordSideCount = (u: number, v: number) => (2 + (u - 1)) * (2 + (v - 1)) * 2;
    const xzCount = texCoordSideCount(this.widthSegments, this.depthSegments);
    const zyCount = xzCount + texCoordSideCount(this.depthSegments, this.heightSegments);

    const textureCoords = this.getAttribute_(AttributeLocation.TextureCoords).data;
    let u,v;
    this.vertices.forEach((vert, index) => {
      if (index < xzCount) {
        u = vert.x; v = vert.z;
      } else if (index < zyCount) {
        u = vert.z; v = vert.y;
      } else {
        u = vert.x; v = vert.y;
      }
      const pointInTextureGrid = [u / scaleX + shiftX, v / scaleY + shiftY];
      textureCoords.set(pointInTextureGrid, index * 2);
    });
    this.setAttribute_(AttributeLocation.TextureCoords, textureCoords, 2);

    return this;
  }
There may be an even better way to do this, but this got the job done, and I had (mostly) seamlessly tiling textures across multiple cubes. There are of course still some places where you can see a seam, but with fully auto-generated texture coords, the results are quite good. This is the one improvement that let me build the castle. After that it was just time, lots of time, writing out the commands that built the castle. Below is a video showing an early version of the castle walls.
SVGs are GOOD
I mentioned this up front already, but lets look at some reasons why. Last year in my post mortem I wrote about having to figure out how to make my noise algorithm tile so I could use it for textures that could be seamlessly repeated. I figured it out, but there was extra logic and code involved. To make noise generated from SVGs tile, you do this:
stitchTiles="stitch"Add that to the feTurbulence tag and you get a tiling pattern. This is much smaller and easier!
Last year I made my noise tile repeatedly in three dimensions so I could “slice edges of the cube off” to use for my skybox. With SVGs, I can’t do that. This means there would be seams where the top of the skybox meets the sides. However, since SVGs also support radial and linear gradients, I simply use those to fade my clouds down to invisible at the edges of the skybox, and there’s not pattern at the edges to have a seam.
Now lets look at the quality of textures you can create, and the very small amount of bytes (code characters) it takes to create them.
function rockWoodFilter(isRock?: boolean) {
  return filter(fullSize({ id_: 'rw' }),
    `<feDropShadow dx="${isRock ? 1 : 300}" dy="${isRock ? 1 : 930}" result="s"/>` +
    feTurbulence({ type_: NoiseType.Fractal, baseFrequency: isRock ? 0.007 : [0.1, 0.007], numOctaves_: isRock ? 9 : 6, stitchTiles_: 'stitch' }),
    feComposite({ in: 's', operator: 'arithmetic', k2: isRock ? 0.5 : 0.5, k3: 0.5 }),
    feComponentTransfer({}, feFunc('A', 'table', [0, .1, .2, .3, .4, .2, .4, .2, .4])),
    feDiffuseLighting({ surfaceScale: 2.5, lightingColor: isRock ? '#ffd' : '#6e5e42' },
      feDistantLight(isRock ? 265 : 110, isRock ? 4 : 10),
    ),
  )
}

function getPattern(width: number, height: number) {
  return `<pattern id="p" width="${width}" height="${height}" patternUnits="userSpaceOnUse"><path d="m 0 246 h 148 V 125 H 0 V112 h72 V0 h15 v112 h 74 V 0 H 0"/></pattern>`;
}

function bricksRocksPlanksWood(isRock?: boolean, isPattern?: boolean) {
  return toImage(svg({ width_: 512, height_: 512 },
    (isPattern ? getPattern( isRock ? 160 : 75, isRock ? 256 : 1) : '') +
    rockWoodFilter(isRock),
    rect({ x: 0, y: 0, width_: '100%', height_: '100%', fill: isPattern ? 'url(#p)' : undefined, filter: 'rw' })
  ));
}
This resulting code is slightly a mess, mostly because to keep things small I just pass in parameters that need changing and reuse the function. This is code using my SVG library (for most tags, a couple new ones are added in manually), and these three methods produce four textures:

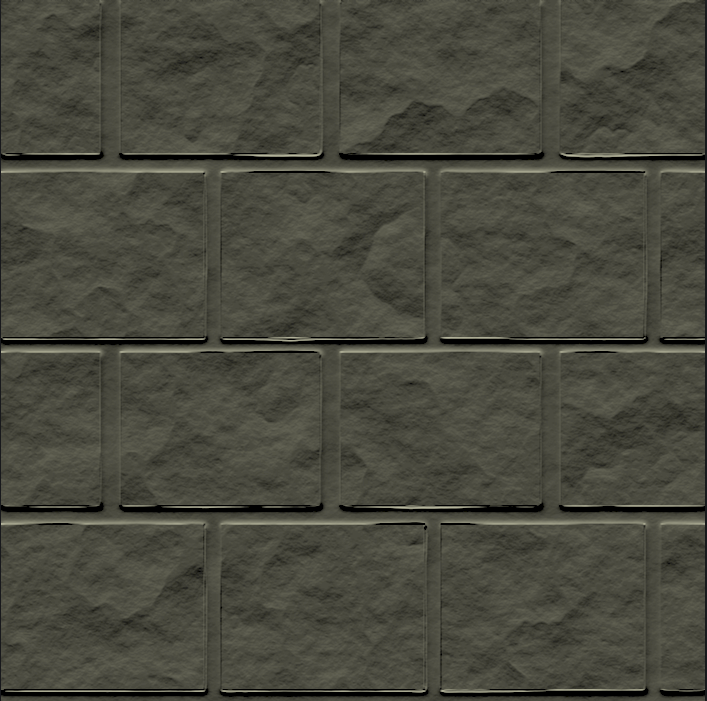
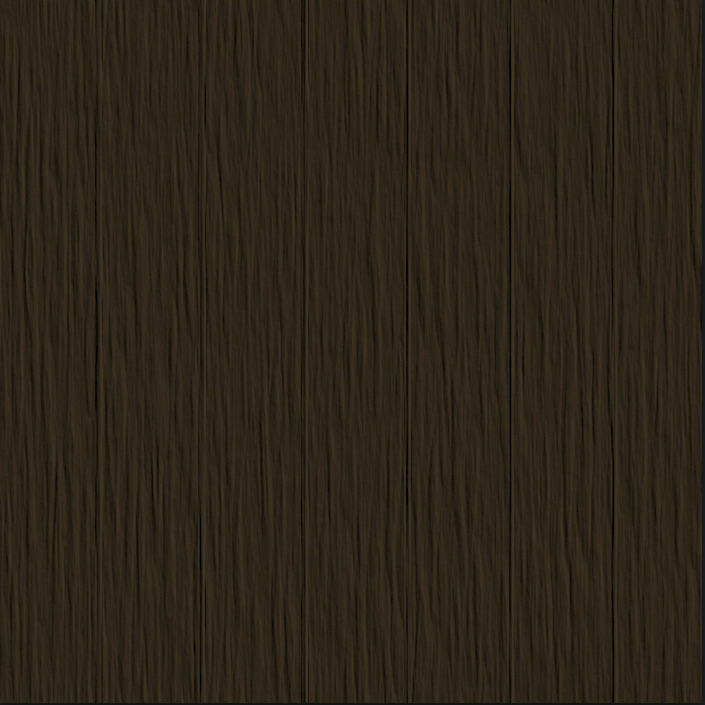
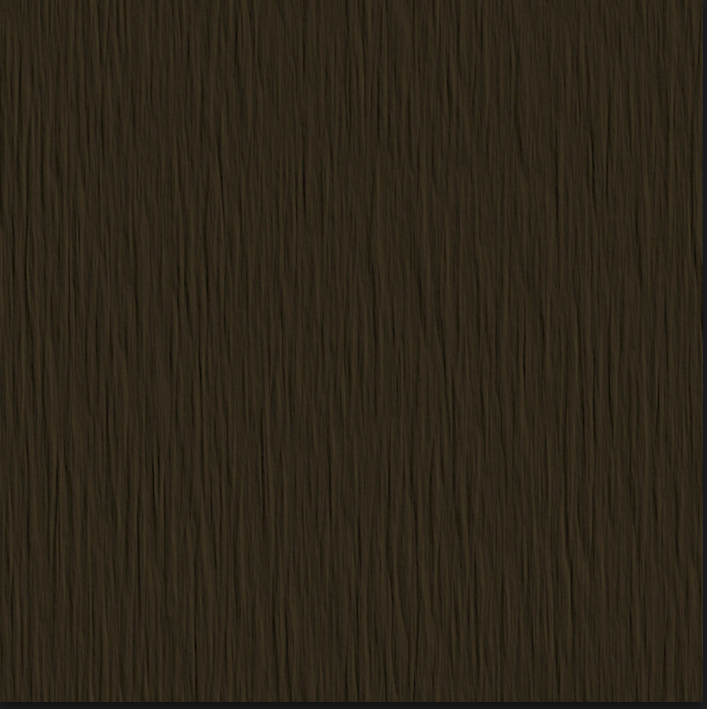
It would be nice if the planks on the wood were more obvious, and with a little more effort they definitely could be, but with the size/time constraints I was happy enough to leave it as it is.
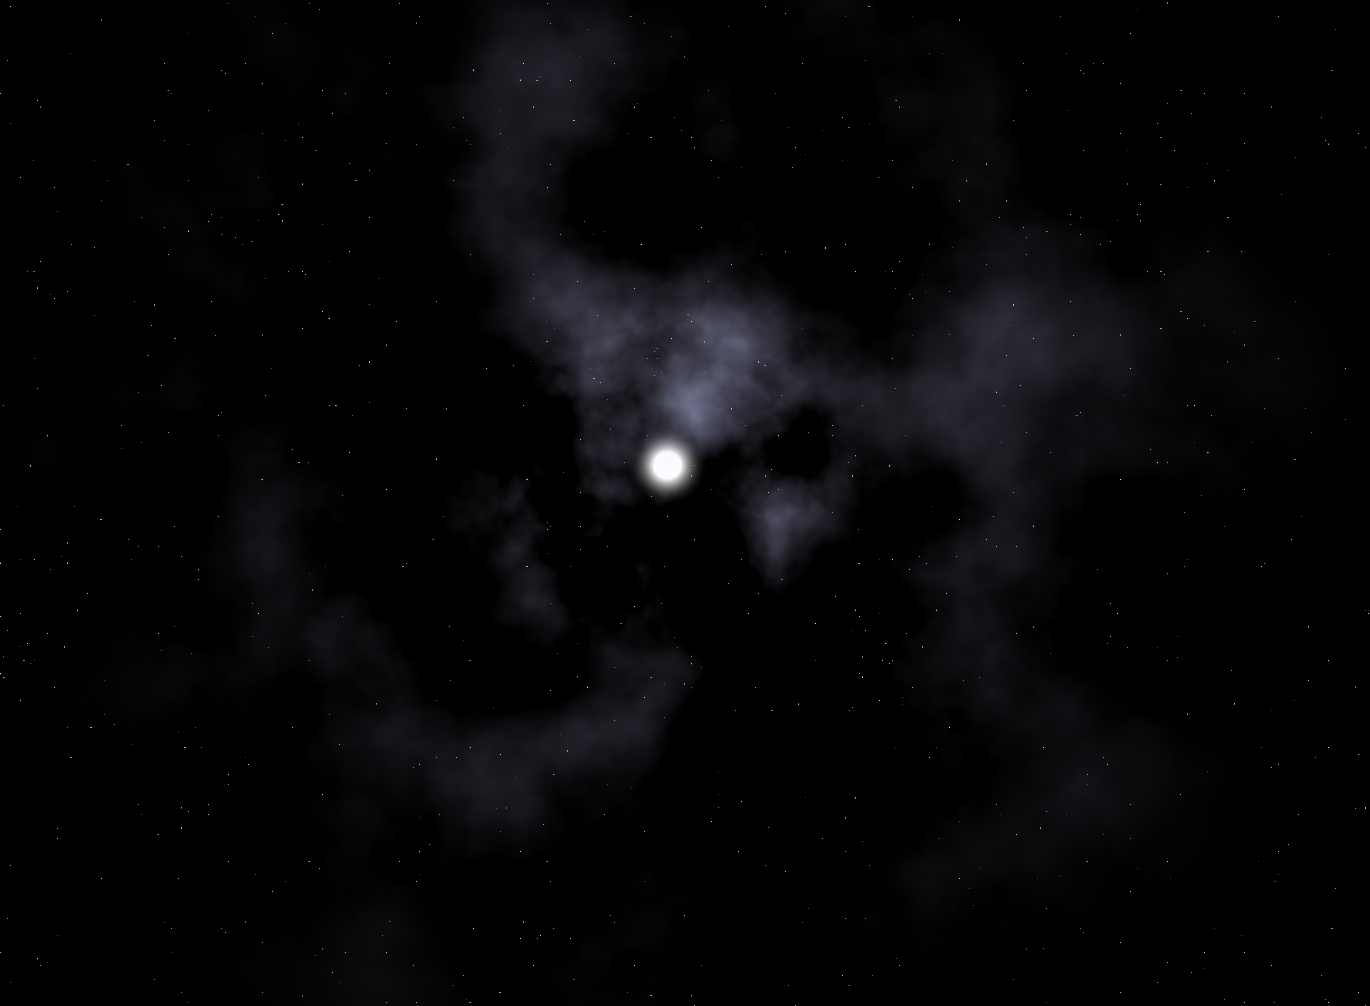
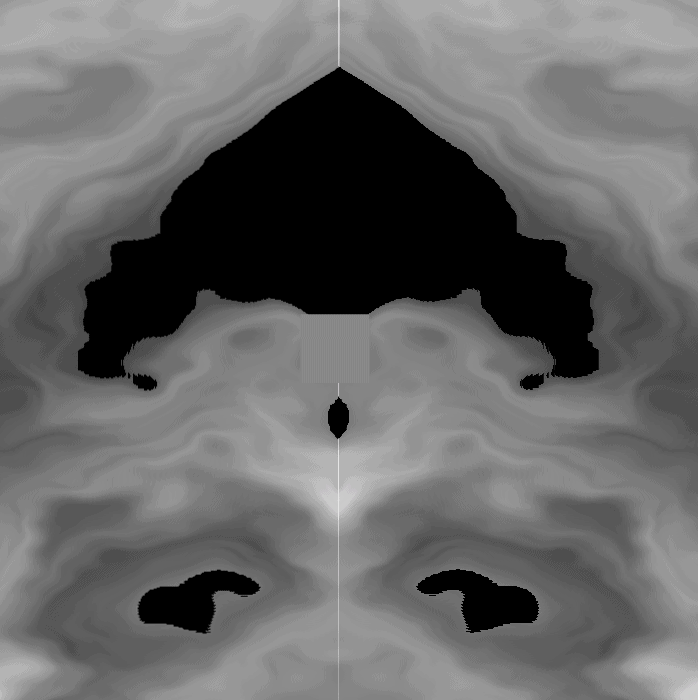
A couple more interesting ones are the skybox, especially the top of it, and the face of Upyri. They skybox top uses a radial gradient to make the clouds brighter near the moon, which looks really cool. Upyri’s face had to be flipped upside down, and a hole at the top of his mouth patched, but this was the best creepy face I could get to generate from noise.
function drawClouds() {
  return stars() + filter(fullSize({ id_: 'f' }),
      feTurbulence({ seed_: 2, type_: NoiseType.Fractal, numOctaves_: 6, baseFrequency: 0.003, stitchTiles_: 'stitch' }),
      feComponentTransfer({},
        feFunc('R',  'table', [0.8, 0.8]),
        feFunc('G',  'table', [0.8, 0.8]),
        feFunc('B',  'table', [1, 1]),
        feFunc('A',  'table', [0, 0, 1])
      )
    ) +
    mask({ id_: 'mask' },
      radialGradient({ id_: 'g' },
        svgStop({ offset_: '20%', stopColor: 'white' }),
        svgStop({ offset_: '30%', stopColor: '#666' }),
        svgStop({ offset_: '100%', stopColor: 'black' })
      ),
      ellipse({ cx: 1000, cy: 1000, rx: '50%', ry: '50%', fill: 'url(#g)'})
    )
    + radialGradient({ id_: 'l' },
      svgStop({ offset_: '10%', stopColor: '#fff' }),
      svgStop({ offset_: '30%', stopColor: '#0000' })
    )
    + rect(fullSize({ filter: 's' }))
    + ellipse({cx: 1000, cy: 1000, rx: 200, ry: 200, fill: 'url(#l)' })
    + rect(fullSize({ filter: 'f', mask: 'url(#mask)' }));
}
export function face() {
return toImage(svg({ width_: 512, height_: 512, style: 'filter: invert()', viewBox: '0 0 512 512' },
filter({ id_: 'filter', x: '-0.01%', primitiveUnits: 'objectBoundingBox', width_: '100%', height_: '100%'},
feTurbulence({ seed_: 7, type_: NoiseType.Fractal, baseFrequency: 0.005, numOctaves_: 5, result: 'n'}),
feComposite({ in: 'SourceAlpha', operator: 'in' }),
feDisplacementMap({ in2: 'n', scale_: 0.9 })
),
rect(fullSize({ id_: 'l', filter: 'filter', y: -14 })),
rect({ fill: '#fff', width_: '100%', height_: '100%' }),
`
<use href="#l" x="22%" y="42" transform="scale(2.2, 1.2)"></use>
<use href="#l" x="-22%" y="42" transform="rotate(.1) scale(-2.2 1.2)"></use>,
`,
rect({ fill: '#777', x: 220, y: 230, width_: 50, height_: 50 })
));
}
Doors and Levers
With puzzle solving being a key concept in the game design, my mind immediately went to Tomb Raider and the large satisfying levers. Hooking these up was pretty easy, and a very fun break after lots of castle modeling. One little piece of trivia, while my engine certainly supports moving platforms, adding the code in to do it just for doors seemed like a poor use of space, so the doors just have one closed collision cube and one open collision cube. When you pull the lever the collision is immediately swapped out, so you can walk right through doors while they open. Another fun fact, there is no ceiling collision detection in the game, as it wasn’t needed.
Knowing the lever system would get a little repetitive, I added a key and locked door to the game. But, behind the scenes, the key also uses a lever. The lever starts out far below ground, where it’s too far away from the player to ever be pulled. When the player picks up the key, that triggers the lever to raise up into the wall beside the door. Now when the player presses action near the door, they pull the lever, even though they don’t see it, and the door opens.
Audio
While last year I had pretty good sound effects and 3D spatial audio, I ran out of time and space for music. I definitely didn’t want to repeat that mistake, so I wrote a short creepy tune to use in the game. As cool as ZzfxM is, its way too much code for the short song I wrote, so I simply took a zzfx note, wrapped it in a function and replaced it’s duration and frequency with function parameters, and called that function with arrays:
const music = (freqs: number[], durs: number[]) => {
  return createAudioNode(freqs.flatMap((freq, i) => {
    return zzfxG(...[,0,freq,.1,durs[i],.26,2,1.18,,,,,,.2,,,.11,.38,.03])
  }));
};

export const makeSong = music(
  [65.41, 82.41, 77.78, 65.41, 82.41, 77.78, 65.41, 82.41, 77.78, 61.74, 65.41],
  [.25, .25, 1, .25, .25, 1,  .25, .25, .25, .25, 2]
);
And now I have a song. I also took a little sound effect sound and added a gap to it and played it on repeat for some interesting backing sounds.
export function addGap(buffer: number[], seconds: number) {
  doTimes(seconds * zzfxR, () => buffer.push(0))
  return buffer;
}

export const scaryNote2 = (vol = 1) => createAudioNode(addGap(zzfxG(...[vol,0,50,.6,.1,1,,.11,-0.1,-0.1,,,.18,,,,.3,1.01,.5,.08]), .8));
One cool little detail I’m really proud of, even if no one really notices, is that you have different footstep sounds whether you are walking on stone vs walking outside. This is done simply by detecting the players height. The floor of the castle starts 0.5 in game units above the ground, so if the players feet are above the ground and are colliding with the floor, they get the stone footstep sound. If you are at ground level, you get the ground footstep sound.
Terrain and Height Maps
Generated noise isn’t just good for textures, it’s also very good for making terrain. I used this last year, again generating my own noise, then using those values to set the height of vertices across a plane. I already had my moldable cube, which is 6 planes that can be subdivided (one for each side of the cube), so if I only draw the top side of the cube but subdivide it a lot, I get a large plane with lots of vertices I can adjust based on the noise values
class PlaneGeometry extends MoldableCubeGeometry {
  constructor(width: number, depth: number, subdivisionsWidth: number, subdivisionsDepth: number, heightmap?: number[]) {
    super(width, 1, depth, subdivisionsWidth, 0, subdivisionsDepth, 1);

    if (heightmap) {
      this
        .modifyEachVertex((vertex, index) => vertex.y = heightmap[index])
        .computeNormals();
    }
  }
}
Last year I simply passed in my generated noise values instead of drawing them to a canvas for texturing. This year since I’m using SVGs, it’s the opposite. I draw the SVG to a canvas to rasterize it, then take the resulting pixel values, divide them by a scaling factor, and now I have my heightmap.
Using SVGs though gives me some extra easy-to-use tools for my heightmap. Since I’m making an image, I can easily manipulate my heightmap to add features to it. By placing a dark radial gradient that fades to transparent, I can make a crater. Drawing shapes in a neutral gray adds a flat surface. This is what I did to create the “moat” around the castle, the flat surface it sits on, and the path you can walk on. So a couple simple SVG tags later and I have this:
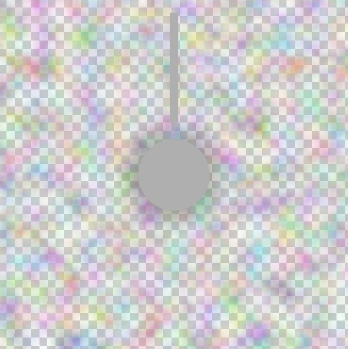
Rasterize that, scale down the pixel values, and feed that into the PlaneGeometry constructor, and boom, you have terrain.
Since this is very easy to implement, late in development I had an idea to help give the castle a bit more visual interest… The game also features silver, gold, and iron textures, take a look at the silver texture here:
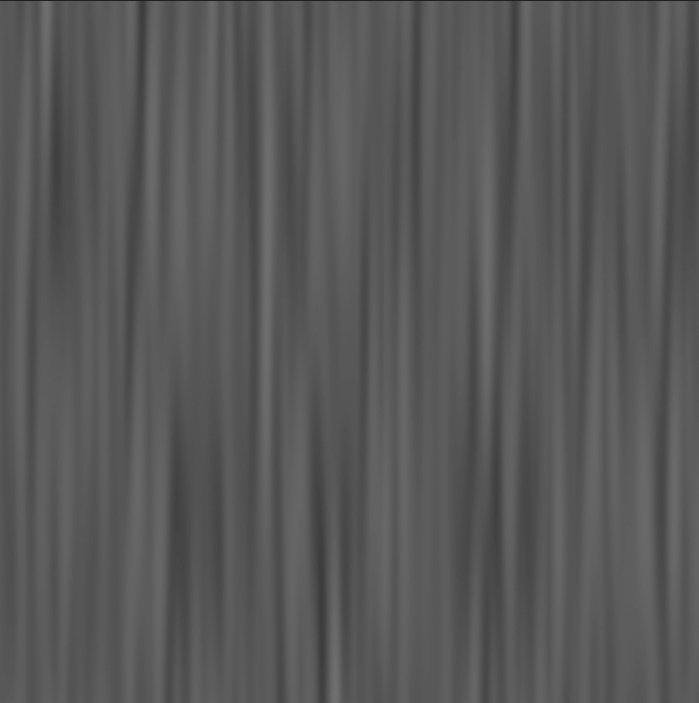
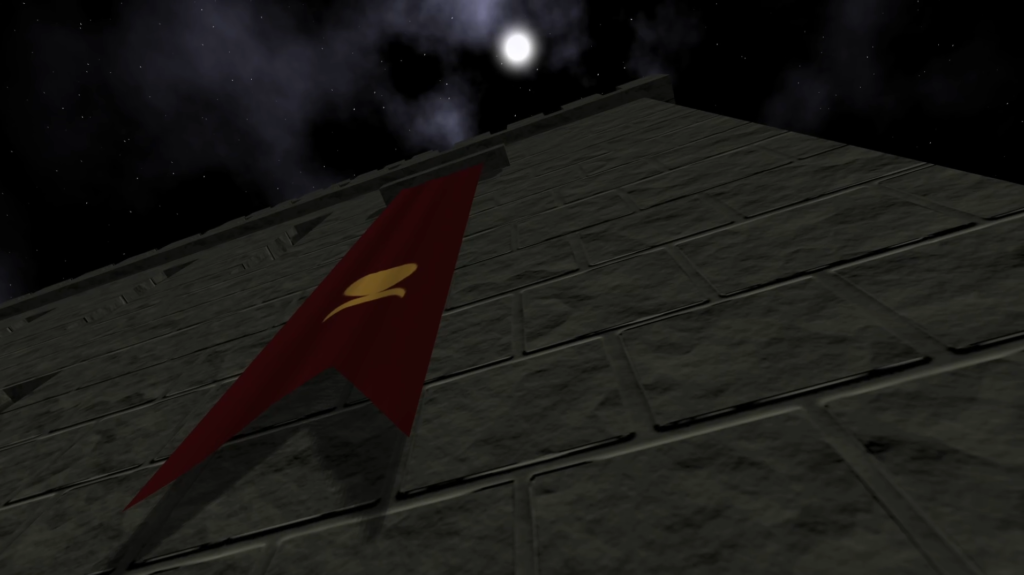
When stretched out across a door or upyri symbol, it does a convincing job of looking like silver. But looking at it, it almost looks like the folds of fabric…
A small portion of this could be used for a height map for some pretty nice looking fabric. And that’s where I got the inspiration for the banner. Like the terrain outside the castle, I can simply scale vertices vertically by a heightmap and get a nice looking curved surface. I reused a corner of this texture as a heightmap for the banners, and the result was really cool (imo).
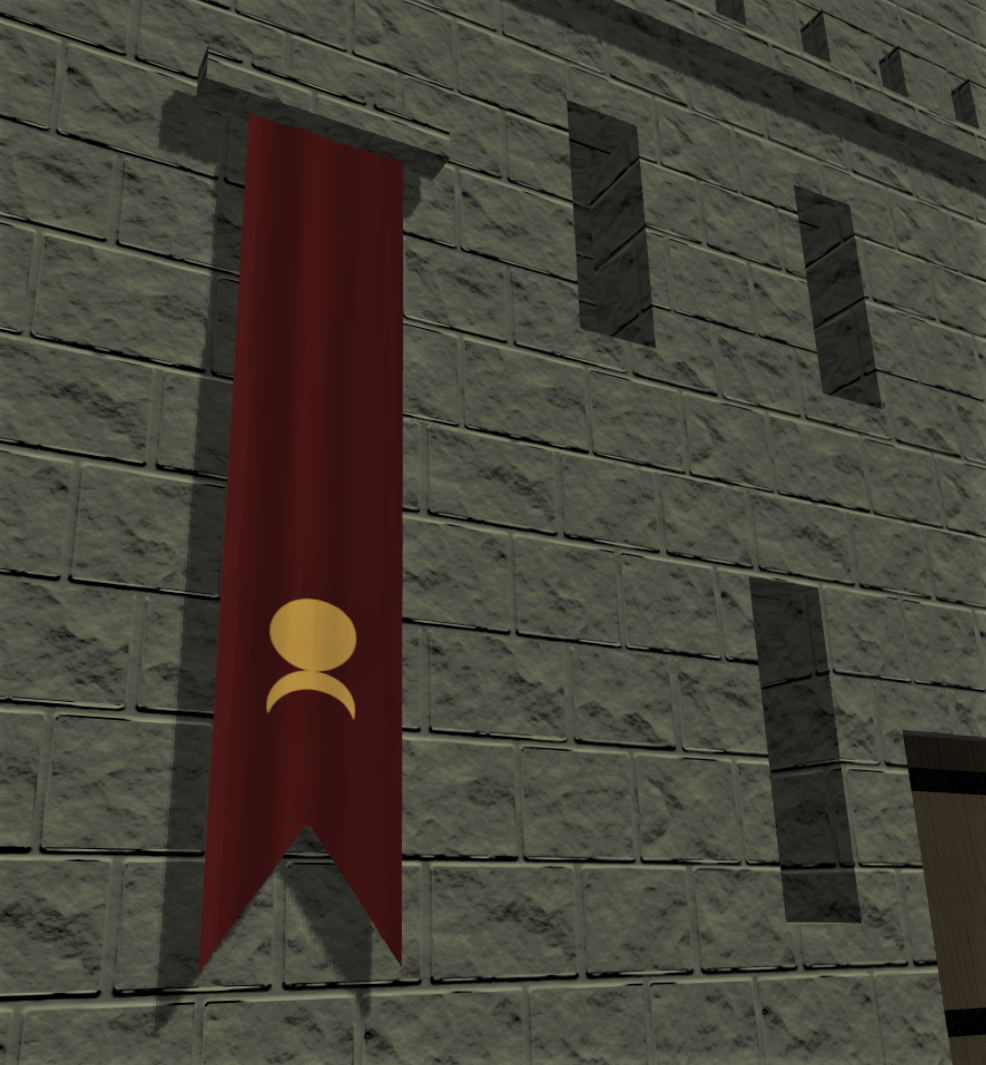
Since I reused an existing texture and already had a PlaneGeometry that could take a heightmap, this banner used very little extra code and came out really nice.
Shadows
The other big upgrade to my engine was shadows. Shadows make a HUGE difference in the look and feel of a game, but the details of making shadows are already outlined in great detail in my two tutorial posts here and here.
Summary
Obviously a lot more went into this game, especially the level design. While it’s very hard to make a curated designed level in only 13kb, I’m really proud of how this turned out. I used windows, light, and shadow to highlight switches and doors they open, environmental cues like blood stains and broken walls, and drop down areas to let the player skip tracing their steps back when they completed a task.
There are a few things I want to try to improve ahead of next year’s event.
- My SVG library may be taking up a bit of extra space. While it’s convenient and definitely makes the minified code smaller, it may make the compressed code slightly larger. It might be better to just use template string directly to make the SVGs. Need to experiment with this a little.
- I currently generate normals for vertices with my moldable cube class, but I also need to generate face normals for my collision detection. I believe some of this logic can be unified to save space.
That’s it, of course a lot more went into this game’s development, if you’re interested in more details leave a comment below, or checkout the game’s github page. Please play the game and check out the trailer I made for it!