Ionic 2 Unit Testing Setup: The Best Way
Ionic 2 is written with Angular 2, and that means it’s pretty easy to unit test. Ionic 2 also uses Webpack for bundling, which is ideal for setting up unit testing, so much so that Angular has directions for a Webpack unit test configuration in their official documentation. This guide is based directly on the official Angular guide, tweaked only slightly for Ionic.
Updated 3/22/17: Updated to support Ionic Native 3.x, which is included in the starter projects by default now. Also updated to fix an issue where any image or font files used crashed the test.
Quick Setup
If you don’t already have the Karma cli installed, install it.
npm install -g karma-cliInstall dependencies for Jasmine and Karma, including some loaders for our Webpack config and Jasmine and Node types to keep Typescript happy.
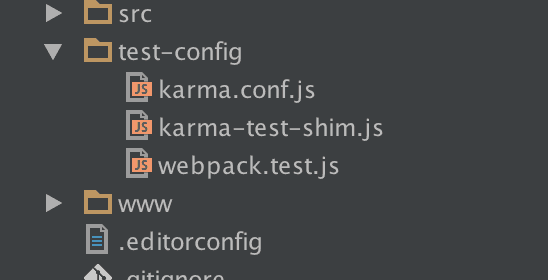
npm install --save-dev @types/[email protected] @types/node html-loader jasmine karma karma-webpack ts-loader karma-sourcemap-loader karma-jasmine karma-jasmine-html-reporter angular2-template-loader karma-chrome-launcher null-loaderWe have to configure Webpack to bundle our files, and configure Karma to load the bundled files. I’ve actually pre-configured these for you, but more details are available further down the post. You’ll need a new ‘test-config’ folder containing three files that handle that configuration in the root of your project. You can actually grab it all zipped here directly, or create the folder yourself and pull the files from my github here. Either way you should end up with a test-config folder with a basic Webpack config, a Karma config, and a Karma test shim.
Now let’s add a script entry to our package.json to run the tests for us.
"test": "karma start ./test-config/karma.conf.js"And finally, add your test files to the excludes section of your tsconfig so they aren’t compiled during the regular build.
"exclude": [
  "node_modules",
  "src/**/*.spec.ts"
],
Alright, that’s it. You can now run your tests from the command line with:
npm testOr set up a standard Karma build config in your IDE of choice. Remember tests should live alongside the components they test and should be named after the component but with .spec appended.
Write a test
This isn’t meant as a test writing guide, for that I’d recommend Angular’s official documentation and the Jasmine docs, but let’s write one to test out our new configuration. Here I’m using the sidemenu starter project and in the src/app folder I create a test for the app component. Again, the test also lives in src/app and is named app.component.spec.ts.
import { async, TestBed } from '@angular/core/testing';
import { IonicModule } from 'ionic-angular';
import { StatusBar } from '@ionic-native/status-bar';
import { SplashScreen } from '@ionic-native/splash-screen';
import { MyApp } from './app.component';
describe('MyApp Component', () => {
let fixture;
let component;
beforeEach(async(() => {
TestBed.configureTestingModule({
declarations: [MyApp],
imports: [
IonicModule.forRoot(MyApp)
],
providers: [
StatusBar,
SplashScreen
]
})
}));
beforeEach(() => {
fixture = TestBed.createComponent(MyApp);
component = fixture.componentInstance;
});
it ('should be created', () => {
expect(component instanceof MyApp).toBe(true);
});
it ('should have two pages', () => {
expect(component.pages.length).toBe(2);
});
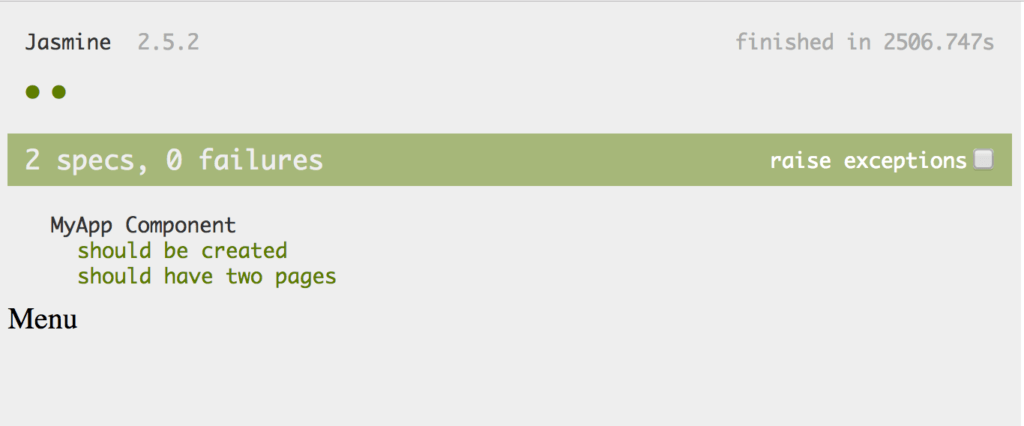
});This is a fairly straightforward test, we simply create the MyApp component before each test, then check that it was created and that it contains two pages.
Run ‘npm test’ and we can see our test results in the console.

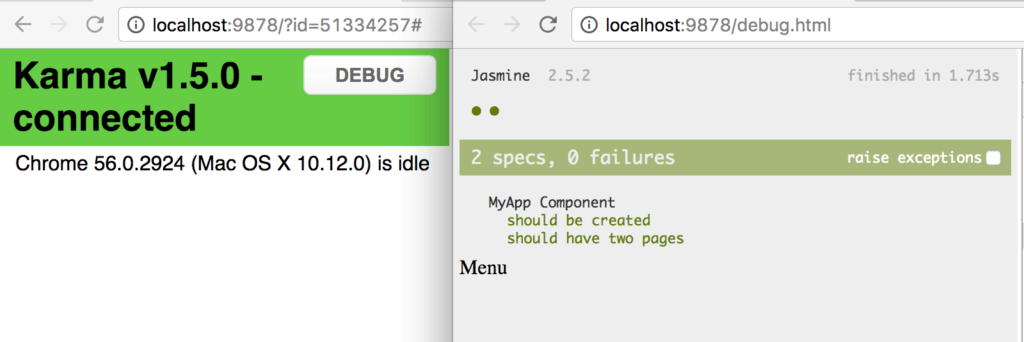
Additionally when you run the tests Chrome will open (if you want to use a different browser you’ll need a different launcher for Karma), it will show a green bar along top with a button that says ‘DEBUG’, if you click that you can see the test results. Below you can see both windows side by side.
You’re done, you’re free to stop reading now, but if you want to know more see the next section. You can also check out a fully running example here: https://github.com/roblouie/unit-testing-demo
Okay cool, but how does this work, what were those three files I put in test-config?
Those three files are taken almost directly from the Angular Webpack config guide I mentioned earlier. If you really want to learn the details please check out that link, but I’ll give a short synopsis here.
Ionic actually already uses Webpack for bundling, the configuration is just hidden from you in node_modules/@ionic/app-scripts/config/webpack.config.js. Details of Webpack are beyond the scope of this article, but it looks through your imported dependencies and bundles all your code together.
We actually need something similar for our tests, so we have the webpack.test.js file to tell Webpack what to bundle. As a bonus since this bundles everything for us, we don’t have to call compileComponents in our tests.
var webpack = require('webpack');
var path = require('path');

module.exports = {
  devtool: 'inline-source-map',

  resolve: {
    extensions: ['.ts', '.js']
  },

  module: {
    rules: [
      {
        test: /\.ts$/,
        loaders: [
          { loader: 'ts-loader' }, 'angular2-template-loader'
        ]
      },
      {
        test: /\.html$/,
        loader: 'html-loader?attrs=false'
      },
      {
        test: /\.(png|jpe?g|gif|svg|woff|woff2|ttf|eot|ico)$/,
        loader: 'null-loader'
      }
    ]
  },

  plugins: [
    new webpack.ContextReplacementPlugin(
      // The (\\|\/) piece accounts for path separators in *nix and Windows
      /angular(\\|\/)core(\\|\/)(esm(\\|\/)src|src)(\\|\/)linker/,
      root('./src'), // location of your src
      {} // a map of your routes
    )
  ]
};

function root(localPath) {
  return path.resolve(__dirname, localPath);
}
The karma.conf.js is a standard Karma config file, the most important part here is we tell Karma to use Webpack and to create sourcemaps, but all other standard Karma options can be tweaked here.
var webpackConfig = require('./webpack.test.js');

module.exports = function (config) {
  var _config = {
    basePath: '',

    frameworks: ['jasmine'],

    files: [
      { pattern: './karma-test-shim.js', watched: true }
    ],

    preprocessors: {
      './karma-test-shim.js': ['webpack', 'sourcemap']
    },

    webpack: webpackConfig,

    webpackMiddleware: {
      stats: 'errors-only'
    },

    webpackServer: {
      noInfo: true
    },

    reporters: ['kjhtml', 'dots'],
    port: 9876,
    colors: true,
    logLevel: config.LOG_INFO,
    autoWatch: true,
    browsers: ['Chrome'],
    singleRun: false
  };

  config.set(_config);
};
Finally the test shim loads some polyfills and tells Webpack to use all our .spec files as the starting modules.
Error.stackTraceLimit = Infinity;

require('core-js/es6');
require('core-js/es7/reflect');

require('zone.js/dist/zone');
require('zone.js/dist/long-stack-trace-zone');
require('zone.js/dist/proxy');
require('zone.js/dist/sync-test');
require('zone.js/dist/jasmine-patch');
require('zone.js/dist/async-test');
require('zone.js/dist/fake-async-test');

var appContext = require.context('../src', true, /\.spec\.ts/);

appContext.keys().forEach(appContext);

var testing = require('@angular/core/testing');
var browser = require('@angular/platform-browser-dynamic/testing');

testing.TestBed.initTestEnvironment(browser.BrowserDynamicTestingModule, browser.platformBrowserDynamicTesting());
So Karma starts with the karma config file. The config file tells karma to use Webpack with our testing webpack config file and bundle our tests in memory, then runs our tests.
Bonus Info: Browser Debugging
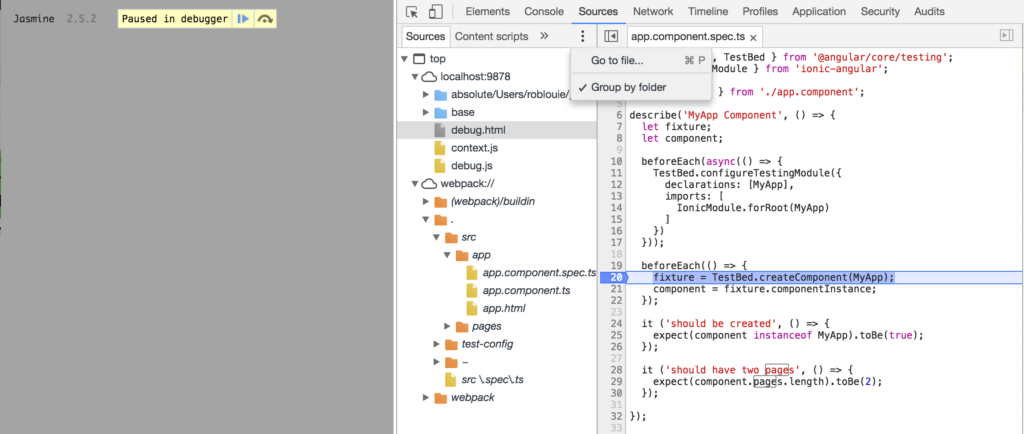
Don’t forget you can debug tests in your browser just as easily as your regular application. You can find the original source under webpack://./src, or just use the “Go to file” menu option and start typing the file you want to open. Then just set a breakpoint anywhere and hit refresh.
Summary
That’s it, you can follow the Quick Start section to easily add unit testing to any Ionic project. Ideally one day Ionic will add this to their own scripts so this configuration is done for us, just like the regular Webpack config. Until then this is a simple way to set up unit testing, and can even be copied directly into any Angular 2 project, not just Ionic projects. Remember you can find a fully working example here: https://github.com/roblouie/unit-testing-demo
Questions? Comments? Know an even better way to set up unit testing in Ionic? Let me know in the comments below, or hit me up on twitter.